
Lacquer For Wood
Shop our massive lacquer for wood range, delivered throughout Ireland and internationally. Breath life into your wooden surfaces with a finishing layer applied with a spray gun. Our quality lacquers for wood will give you a beautifully shiny, long lasting lacquer finishes that are sure to protect your wood for a long time to come.
Lacquers dry fast, are easily applied and offer superior protection to alternatives such as varnish. Spray products offers a superior finish to brush applied alternatives, letting you get an even finish free of brush strokes. Give your project a strong, long lasting lacquer finishes with some of our high quality lacquers.
If you have any questions about what product is best for your project then just get in contact with us. We will be able to guide you through and find just what you need.
Nitrocellulose Lacquers
Nitrocellulose Lacquers have a multitude of uses and have been around for a long time. It is made by dissolving nitrocellulose into a base of solvents and then combining this with plasticizers to add strength and flexibility. Nitrocellulose lacquers can have a slight tint to them, which may not be perfect for the certain kind of woods.
Nitrocellulose Clear Lacquer 001 SMT
Fast drying & dead matt sheen with smooth finish
–
20 & 5L
–
10% Gloss
–
Product Code: 220001
Nitrocellulose Clear Lacquer 002 MT
Fast drying & low sheen with smooth finish
–
20 & 5L
–
25% Gloss
–
Product Code: 220002
Nitrocellulose Clear Lacquer 003 SM
Fast drying & satin sheen with smooth finish
–
20 & 5L
–
35% Gloss
–
Product Code: 220003
Nitrocellulose Clear Lacquer 083 HG
Super high gloss finish with excellent clarity & smooth finish
–
20 & 5L
–
90% Gloss
–
Product Code: 220083
UV Lacquer
UV Lacquer is a tough wearing product, usually applied to high traffic areas giving a tough protective film. A highly specialized product, it is designed to be highly flexible, and resistant to scratches and marks.
UV Roller Coat Clear Lacquer 0161 MT
UV Clear roller coat product that offers huge chemical & physical resistance
–
20KG
–
50% Gloss
–
Product Code: 670161
Polyester Lacquer
Polyester lacquer are three part products that consists of resin, catalyst and accelerant. It is very strong thanks to it’s tight molecular structure and has a very strong resistance to scratches and chemicals as well as a very high sheen. This however does reduce it’s flexibility. It is used on surfaces such as electric guitars and pianos.
PO Catalyst 012
Polyester Catalyst for Polyester Basecoat & Lacquer
–
1L
–
Product Code: 690012
PO Accelerator 001
Peroxide Accelerator for Polyester basecoat & Lacquer
–
1L
–
Product Code: 680001
Water Based Lacquer
Water based products are long lasting lacquers, best used for interior woodwork like chairs and tables. It gives a strong and durable finish with great clarity. Water based lacquers are low odour, non-yellowing and there is no need for a sealer. These lacquers are also better for the environment and indoor use due to their low-toxicity
Clear Lacquer 052 SMT
Water based product that is easy to apply & has excellent anti yellow properties
–
20L
–
5% Gloss
–
Product Code: 270052
Clear Lacquer 053 SMT
Water based product that is easy to apply & has excellent anti yellow properties
–
5 & 20L
–
25% Gloss
–
Product Code: 270053
Clear Lacquer 054 SMT
Water based product that is easy to apply & has excellent anti yellow properties
–
5 & 20L
–
35% Gloss
–
Product Code: 270054
Pick the Right Wood Lacquer
What is wood lacquer? Wood lacquer dries fast, is resistant to scratches and marks, waterproof and transparent. They are one of the most popular topcoats for wood due to these factors as well as the fact offer very little yellowing with age and do not need much maintenance.
It is similar to varnishes but offer different benefits and are generally spray applied instead of being brushed or rubbed on. They are also similar in the sense that lacquers do not stain or soak the wood, and instead offer a tough protective film on top. Wood lacquers have been commonplace since the early 1900s and have been one of the leading wood finishing choices for decades.
Benefits of Lacquer for Wood
Wood lacquer is a great option to use in numerous situations, read on to see why we think it could be the choice for you.
- Wood lacquers cure to a very hard and long lasting wood finish that will offer massive resistance to scratches or marks
- Lacquers are waterproof meaning you don’t have to worry about soakage into your wood like with oil.
- Depending on your chosen lacquer, they are resistant to yellowing and clouding over time.
- They are very low maintenance and do not require attention for years at a time.
Drawbacks of Wood Lacquer
- You need specialised equipment to apply them such as sprayers and tools to keep the area clean.
- If your surface does get scratched, it is very difficult to get the mark back out of it or fill it.
- When first applied, the lacquer will degas for about a month. This gas is toxic and bad for health.
Different Types of Wood Lacquer
There are lots of different types of wood lacquers out there, but here is a break down of the 3 most common varieties.
Acrylic Lacquers
Acrylic lacquers have their origins in the 1950’s and were intended to be used on lighter woods like ash and birch. These products contain acrylic synthetic polymers which when dried mean you do not have worry about yellowing like nitrocellulose lacquers. Not only do they not yellow, they are more durable and scratch resistant than NC lacquers.
CAB acrylic lacquers are the most popular acrylic lacquers and avoid the common pitfalls of other varieties such as cracking. CAB lacquers are made up of cellulose acetate butyrate (CAB) as well as other acrylic resin.
Catalysed Lacquers
Usually lacquers are made up of solvents that do not allow it to cure. Overtime, these solvents evaporate allowing the lacquer to dry. There also usually some other chemicals involved that let the lacquer dry harder than just by using the evaporation process.
As lacquers go, catalysed lacquers are relatively new only coming into the world in the 90s. They offer better durability and are easier to work with versus other lacquer finishes at a similar price. They come either pre-catalysed from the manufacturer or you will have to add the catalyst yourself.
Water based Lacquers
Water based lacquers are, as the name suggests, lacquers that are made from a water base. They are made up of less hazardous materials than solvent based lacquers and are less damaging to your health. However, they are not as hard wearing as other lacquers.
Wood lacquers have a tonne of variety, with each offering you different benefits and drawbacks. Check out our range of lacquers here to see if we have one that will suit whatever job you have in mind. See if lacquer is the right choice for you in our oil vs lacquer comparison.
How To Apply Wood Lacquer
Using a quality wood lacquer can give you an elegant, durable finish to your wood floor or wood furniture that is both hard wearing and enticing. This improves the longevity of your wood and keeps it safe for time to come. Applying it correctly is not easy. Too heavy an application will make it gummy and even. Too little and the lacquer finishes will be too thin and not give you the desired look. Read on to see how to correctly apply wood lacquer.
Due to the fact lacquer dries rapidly, we recommend applying lacquer for wood using a sprayer. Although they will not fully cure for hours, lacquers can become dry and tacky in a matter of seconds. This is great if you are a skilled professional applicator but for the normal person it can be cruel.
Step One – Prepare the Wood
Your first step should be to seal up any holes or cracks in the wood. Use some filler to do this. You then want to seal the wood in general top stop soakage. For packing in the filler, use something with a point to get it into all the nooks and crannies.
You can then sand the wood. You can choose to spot sand certain parts of the wood with a medium grit sandpaper of around 150 grit or sand the entire surface using the relevant grits. Once this is done you can clean the surface with a vacuum, brush or air blower.
Step Two – Apply Your Lacquer
Now comes the time to apply your lacquer for wood. As we said before, it is best to apply lacquer with a sprayer if you can. A respirator and gloves are must as your working with very toxic material.
When using a sprayer, the best option is a HVLP sprayer, as these are high volume, low pressure. Read on to see how to use a HVLP sprayer to apply your lacquer.
- Mix your lacquers with a 50:50 combination of lacquer and lacquer thinner
- Apply your sealant coat with a brush and wait for it to dry, this should take 30 minutes or so.
- Give your wood the lightest sanding with some steel wool.
- Set your sprayer to approximately 30PSI.
- Then fill it with lacquer and 30% lacquer thinner.
- Apply your first coat, focusing on getting as even a layer as possible. Do not spray in circles, instead work in lines across the surface.
- Focus on not having any over sprays or as few as possible. The best way to do this is to keep your sprayer the correct distance away. Too close and your lacquer will go on too thick, too thin and you will have strays. The correct distance is usually 6-8cm.
- Leave it for 2 hours and come back with some steel wool to wipe the surface.
- Repeat this process as many times as necessary, then leave it to cure for 2 days.
- Rub down with steel wool to remove any dust or dirt.
- Sand down with some wet sandpaper then polish with a pumice.
- Give it a quick clean with a damp cloth or some paint thinner.
Lacquer Drying and More Coats
After you apply the first layer of lacquer you will need to leave it to dry. The faster drying time for a lacquer is at least 2 hours before you can go and add anymore layers. Check to see if it is dry by seeing is it tacky. Sandpaper can be used to get rid of any rough edges or uneven areas. This gives you the perfect surface for applying any more layers of lacquer. A very fine sandpaper is recommended to not damage the surface.
Clean away any dust left from your sanding. You can now apply your second and third coats.
Applying Multiple Layers
To add more layers, all you have to do is keep repeating the process you used when you started. Keep doing this and adding layers until you have the look you want. When done correctly, it will give you a smooth and shiny lacquer finish that will show off the best qualities of your wood. If you want your surface to be darker, you can apply more wood lacquer. Allow time between each coat and always wear your safety gear.
How Long Should I Wait Between Wood Lacquer Coats?
On average, lacquer for wood takes a few hours to dry to the touch. This may change depending on the weather though. If it is very warm your quicker drying time will only be a few minutes. If it is humid, this may be extended to multiple hours. If you want to tell if the coat is dry, just touch the surface to see if it is tacky or not. If it is tacky, it is wet.
Wet lacquer produces lots of toxic gases that can be harmful if you are exposed to them for too long. To avoid this, always wear the appropriate safety equipment and spray in a well ventilated area.
Wooden Floor Lacquer vs Wooden Floor Oil
A factor many people do not consider when picking their new wooden floor is the finish they will use once it is laid. Obviously, you can make this decision very quickly if you want to rush it but it is an important one. It will be the finishing touch to your floor and the top layer of tough protective film. It is important to know what will work best for you. In this article, we will explain the difference between wooden floor lacquer and wooden floor oil.
Wooden Floor Lacquer
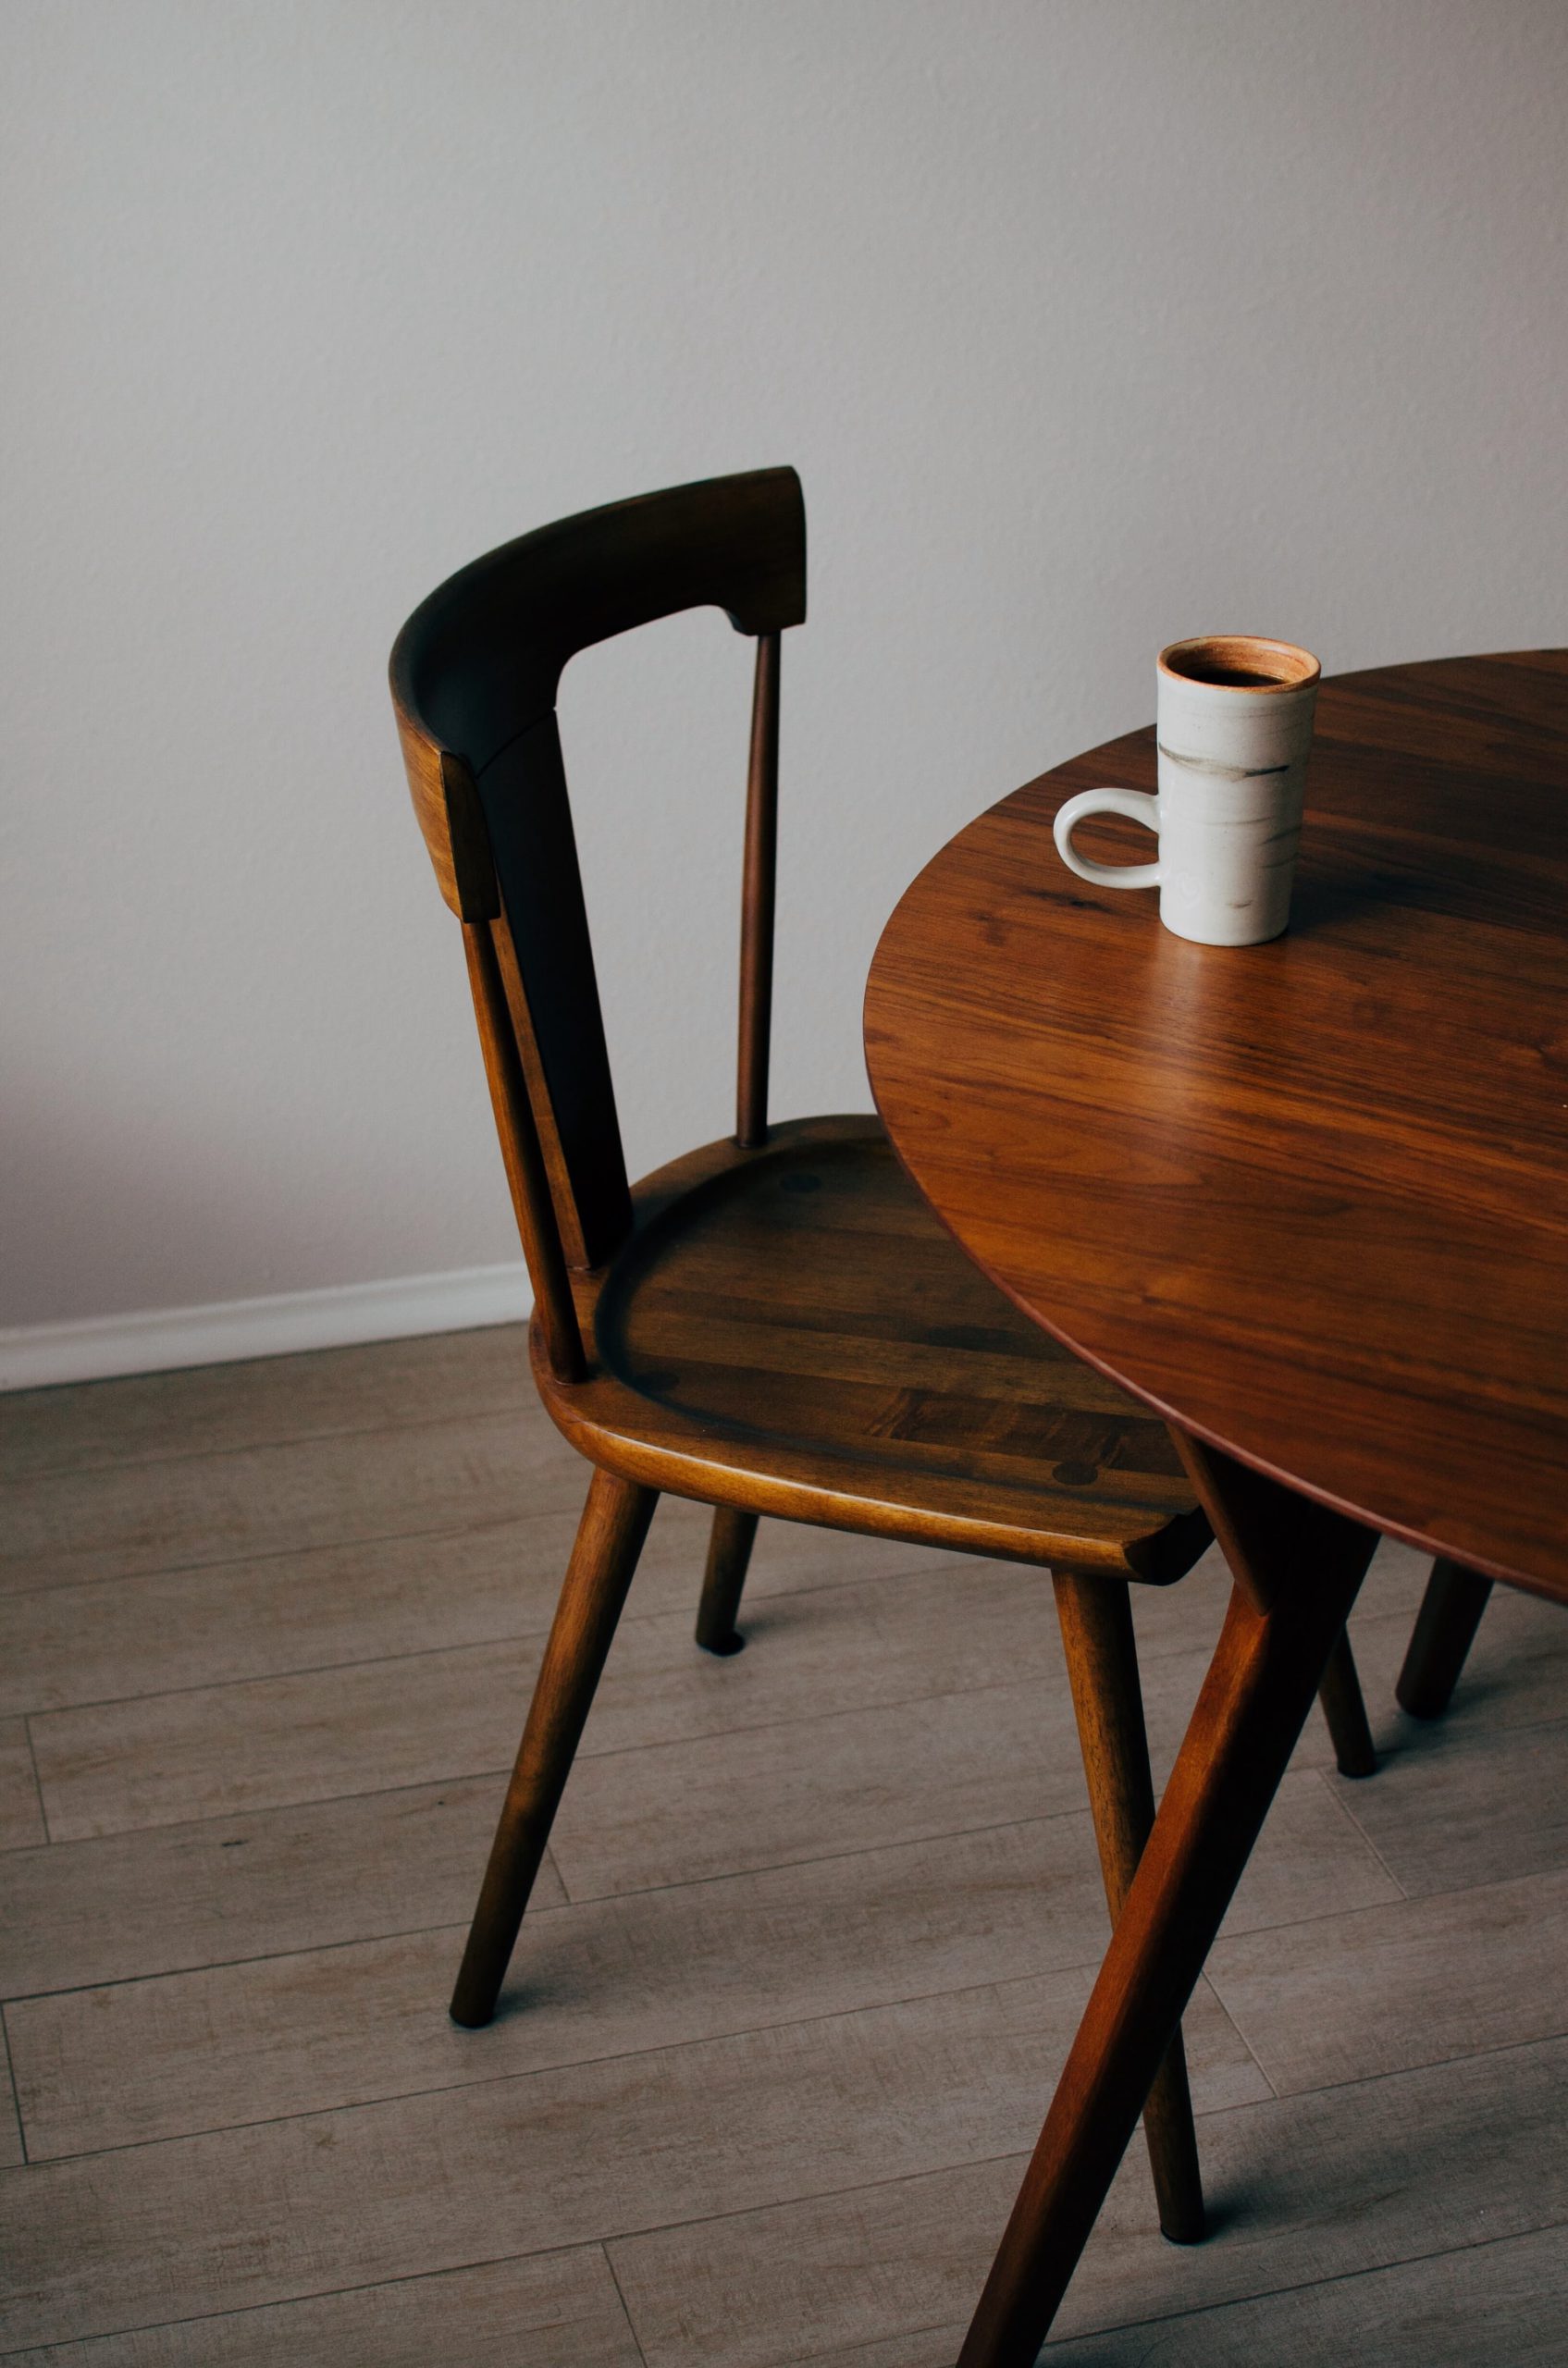
Lacquer is a relatively modern wood covering. It is similar to varnish but offers much more variety and looks. It offers very high levels of protection and usually has some level of gloss to it. Lacquer sits atop the wood unlike many wood coatings. It is perfect for areas where you expect a lot of traffic and wear and tear or where your want a high gloss look.
Lacquers are quite easy to maintain. They are very resistant to water, shrugging off splashes and drops no problem. However, water on any sort of wooden floor is not a good idea and best avoided where possibly. This resistance to scratches and water comes at a price though. Scratches will show up a lot more versus oil, and once the lacquer finishes are worn, the only way to fix it is to sand and reapply the lacquer.
This doesn’t mean that wooden floor lacquer is weak. It is probably the toughest of all the lacquer finishes there are out there. it was used in the likes of gyms, courts and dance halls showing just how tough wearing it is. One thing to be aware of is because of the fact it sits atop the wood, once it is worn away it will just be the bare wood left.
One of the advantages of wood floor lacquer is that any spills or that can be easily cleaned up without damaging the wood. One of main disadvantages is that scratches and scuffs show up far more easily than an oil finish.
Wooden Floor Oil
Wooden floor oil is the modern day equivalent of wax that was common years ago. Now it is usually some form of hardwax oil, it soaks deep into the wood offering protecting and preservation. It is best used when you are looking for a natural, normal finish. It gives the look of something natural and normal – usually matt.
Oil needs more consistent maintenance versus lacquer for wood, however it is unlikely to need something large. You will not have strip it back and reapply. Once the top layer of oil gets removed, there will be continued protection offered. Like any floor, once it is maintained with doormats at entry ways and is cleaned regularly it will remain blemish free and fresh looking.
Thanks to oils high penetration levels, they not only protect the top layer of the wood but far into the heart of the wood. This means you can get the most protection possible for your floor. The colour of the oil will deepen as the years go on, developing with the wood.
If you are wondering what finish is best for your wooden surfaces like wooden floors, then just in contact with us.
How You Can Gain A Smooth Lacquer Finish
Lacquer is actually a non-curing, quicker drying finish. Since it dries so quickly, it can make it very simple to create multiple coats up in a short time. If you utilize the proper supplies and work carefully you may have a smooth lacquer finish easily on almost any workpiece. Read on this post to learn to do just that.
The Best Way To Properly Apply Lacquer to attain an even Finish
It will require practice to figure out how to properly apply lacquer to attain an even lacquer finish. Keep to the steps below:
Remove every one of the old lacquer finishes completely. It is essential to begin with a level, clean wooden surface to have the ideal lacquer. Defects from the wood’s surface continue to hold with every feature layer of varnish. You must remove all tired, cracking, and peeling coatings before the initial lacquer pot is mixed. For polyurethane-covered surfaces, a chemical stripper must be used. If allowed by the budget, work with a paste to prevent splashes and drips. If it is extremely hard, use a liquid product, but use caution to shield your airway and skin from contact.
Even the wood surface
Work with an orbital sander or sanding block to take out rough spots and splinters. Start off using 220 grit sandpaper after which complete the task with 150 grit sandpaper. Work with a vacuum to reduce the dust after which make use of a tack cloth to wipe away dust from the wood surface. The tack cloth’s light wax coating will grab any particles that remain.
Choose a wood grain filler
There are actually both water and oil-based fillers available. It only takes fifteen minutes or perhaps less for the water-based wood grain filler to dry. Additionally, they release fewer volatile organic compounds (VOCs) in comparison to oil-based products, and, for that reason, will not smell as bad. It can take as long as an hour for oil-based grain fillers to dry. Turpentine or acetone should be used to completely clean the brushes. However, oil-based products can easily withstand extreme temperatures, rot, and water better in comparison to water-based wood grain fillers,which can make the ideal choice for finished workpieces that happen to be kept outdoors.
Fill the grain
Wood has pores much like human skin. Those tiny pores can easily absorb lacquer which then causes a stripping result on the wood surface that prevents you from being able to have a really smooth lacquer finish. When wood filler is utilized to fill the pores a flat surface is generated which will absorb lacquer evenly. Apply the filler by using a paintbrush. Then work with a plastic scraper to scrape off all the excess lacquer. Apply firm pressure and scrape against the wood’s natural grain to push the filler deep inside the pores. The filler will dry within a couple of hours. Use 150 grit sandpaper to sand the woods natural grain.
Select the application method
You may apply brushable lacquer by using a brush. However, if you wish to obtain an incredibly smooth lacquer finishing approach we recommend. It is advisable to rent or invest in a spray gun. Additionally there is ‘rattle can’ or spray can lacquer that may be available. However, if it is essential to anyone to have a smooth lacquer finish we will not recommend this device.
Mix the lacquer
To obtain a precise, even lacquer finish, it is important to work with properly mixed lacquer. Thinner lessens the lacquer’s viscosity, rendering it less complicated to spread. Whenever a sprayer and air compressor are utilized to apply lacquer, it always has to be thinner when compared to lacquer that you just apply by using a brush. Pour lacquer in a clean container after which then add lacquer thinner to dilute it. The moment the lacquer is open to air it actually starts to dry, so only mix the quantity you need and cover your mixed lacquer. Refer to the instructions given by the producer, work with a lacquer thinner to dilute the lacquer, and then stir it until it really is thoroughly mixed.
Prepare the job environment
To securely build a smooth lacquer finish, limited humidity and adequate ventilation are essential. Try eliminating all causes of dust. Plastic coating or dust sheets can be employed to protect your projects from lacquer, splashes, and drips. Be sure you wear protective clothing, including an eye shield, respirator, and gloves.
Apply the initial coat of lacquer
Unlike polyurethane, lacquer provides a buildable wood finish. The built-up application process offers a shiny, deep, and delightful lacquer finish. However, every layer must be perfect to accomplish this sort of result. Spraying is the perfect technique for building a thin, even coat of lacquer while avoiding splashing, dripping, and bubbling. Fill the reservoir of your sprayer with thinner lacquer and after that connect it with compressed air. Press the trigger and move the nozzle across the workpiece surface within a backwards and forwards motion to utilize a level and thin layer of lacquer. The lacquer will be dry to touch and become non-tacky in around twenty minutes.
Sand across the lacquer and take a look at your work. Level the lacquer surface through the use of 400 grit sandpaper and have it ready for receiving additional coats. Work with a tack cloth to wipe across the lacquered surface to reduce the dust. Run your hands all over the lacquer surface to confirm for lumps and bumps. Horizontally shine a light across the surface to examine its evenness. If possible, sand.
Apply two additional coats of lacquer
Between each coat, sand. Allow the lacquer dry for the day prior to applying the last coats. Then move ahead with the finishing coats. Your mixed lacquer must be held in an airtight container overnight. Mixed lacquer should not be returned to an unmixed lacquer container. You may have probably managed to perfect the application technique presently. Between all of the coats, permit the lacquer completely dry. Then use 400 grit sandpaper to rough it. Prior to applying the subsequent layer, wipe away the dust. 3 or 4 lacquer coats must provide a shiny and smooth lacquer finish. Your lacquer must be smooth, even, and possess no dimples. At this stage, clean your sprayer or brushes.
Rub-out your Lacquer to obtain a Smooth Sheen
Upon having completed applying lacquer coats and the workpiece is dry, inspect it thoroughly. Miniscule components of fibers, sawdust, and dirt that float with the air can be a part of the sticky varnish. Fortunately, the debris is easy to remove along with the top lacquer layer may be smoothed out.
Sand
Get started using 400 grit sandpaper which is wrapped in a felt block. Apply very light pressure, stroking the sandpaper across the lacquer surface. A number of brief passes must be sufficient to get rid of most of the debris. Begin at the center area of the workpiece and perform the ends last. You must avoid breaking the lacquer coats you have applied. This system requires minimal pressure. When you are sanding, you may see that the lacquer finishes have some minor scratches. We are going to be buffing them in the following step.
Buff
Wrap your felt block within new, 0000 steel wool. Slide your steel wool over the lacquer’s surface using light pressure plus a light touch to remove any scratches your sandpaper has left. Start in the middle and be extra careful when buffing the sides out. Operate in exactly the same direction as the wood’s natural grain. Tend not to buff or sand over the grain. That may leave minute scratches regardless of whether extra-fine high-quality steel wool is utilized. You will discover a final technique that may be needed to get rid of the defects from your coat of varnish.
Buff yet another time. Take your steel wool and dip in soapy war. A foam block may be used to guide your soapy steel wool across the wood’s surface using circular motions. As soon as the entire workpiece surface is soaped a few times, work with a clean tack cloth or rag to wipe away the soap and water and view your job.
Take a look at the work. To confirm your projects, gently run your hands over the finished lacquer to ascertain if it feels silky smooth and possesses no protrusions or bums. Inspect the lacquer visually to guarantee they have a level sheen. If aspects of the wood are less or maybe more reflective than the others, the very last step must be repeated with steel wool to ensure the sheen might be evened out.
What kind of Lacquer Achieves The Ideal Smooth Finish?
Lacquer is actually a solvent-based wood finish unlike varnish finishes. Three of the main sorts of lacquer are catalyzed, acrylic, and nitrocellulose. Carry on and read through this article to discover what sort of lacquer works the most effectively for the specific project.
Nitrocellulose Lacquers
It is a common and popular item that is easily available and cheap. Its light amber tint enables you to enhance the look of various types of woods. However, there are brushable formulations available, for an even more even and smooth result is possible with spraying.
Any open flames must be taken from the spray area and ensure it is well-ventilated since lacquer is actually a highly flammable substance after it is in mist form. The last coat is dissolved by each layer and in addition mixes along with it. You may need to employ a lacquer retarder in high-humidity environments to reduce blushing.
Acrylic Lacquers
This particular lacquer adheres very well to metal. Unlike nitrocellulose lacquers, after a while it can not yellow and keeps a crystal-clear lacquer finishes for a long time. You will definitely get the ideal performance from acrylic lacquers after it is applied by using a sprayer. In comparison to nitrocellulose lacquers, it would possess a less brittle and much more flexible, durable finish.
Catalysed Lacquer
The majority of lacquers harden as a result of solvents evaporating. For catalyzed lacquer, the chemical process is a part of the curing process. A hardening effect is sparked at the same time if you combine two reactive chemicals.
Pre-catalyzed lacquer should be mixed as soon as you take it home. However, post-catalyzed lacquer is mixed and it can be used right from the can. Once catalyzed lacquer is mixed, it comes with a short life, so only get the amount which you actually want to use.
Conclusion
A nitrocellulose layer must be used if you wish to obtain an incredibly smooth lacquer finishes. To protect yourself from yellowing, a catalysed or acrylic lacquers must be used. The lacquer needs to be established by using it in even, smooth layers by using a sprayer. Finnish the work by rubbing out your lacquer using steel wool and sandpaper.
How to Relacquer Your Lacquer Floor
Finding the proper lacquer finishes for your flooring can be a tough task at the best of times. There are a tonne of options out there from oil and white wash to distressed and lacquer. Today we are going to be discussing how to relacquer your floor. It is perfect for high traffic areas that will face a lot of touching, walking and general wear. It usually has a sheeny finish but can be matt. However, no matter the choice it will be very durable.
Unlike an oil finish, lacquer sits atop the wood instead of soaking into it. This means that the wood will hardly ever face actual wear with the lacquer taking the brunt of it. However, this means that the lacquer will take a lot of the damage itself. It will scratch, dull and generally wear down. You do have multiple options to make small fixes to the surface such as lacquer pens but if it is a bit more serious then you will need to recoat. Read on to see what the process of doing this entails.
Obviously, first off you need to clear the room of furnishings. There will be a lot of dust from sanding and you will need to get around the room. Always lift the furniture on wooden floors, dragging it cause even more damage to your floor. Then check your floor for any nails or staples that need to be punched back in or removed.
Once all of this is done, you can begin the process of sanding your floor. A drum sander and edge sander is recommended. You will also need a range of sandpapers going from 40 grit up to 120 grit. Start from the heaviest grit sandpaper first and start making your way down to the lightest grit you have. Let the dust settle, give the floor a thorough clean, focusing on the gaps to be sure you get everything.
Relacquer Floor – Begin
Pick the type of lacquer you need. To reapply the lacquer finish to the floor, begin at the edges and work your way towards the door and out of the room. Use a paintbrush for the edges and a roller for the main part of the room. Remember to always work in sections and follow the grain.
Once it has dried, maintenance should be easy. You can treat it like a normal floor by hoovering and mopping it. Water is fine on lacquer floors, they are resistant to water. Do avoid letting water sit on the surface though. For a bad stain, just use a detergent of some sort that is designed to be used on wooden floors. If you are unsure what will work best for your floor, then just get in touch. If you want another view at how to lacquer your floor then just read our guide.
How To Repair Lacquer Floors
An easy way to maintain and repair your your lacquer floors is a lacquer pen. They allow you to easily touch up and improve small marks, scratches and general tiny abrasions on your layer of lacquer. They work best on spot scratches or narrow, deep scratches. The pen contains lacquer that you can match to your floor. We would say however you should try it first on a discrete area that will not show up the lacquer if it is the wrong colour. The pen will have multiple head sizes letting get the correct distribution for your scratch.
If, however, your scratch or mark is in anyway slightly larger though a lacquer pen just won’t be good enough. If the marks have come from wear and tear or general use then you will need something a little bit more drastic than the pen. This is when you will have to consider sanding back and reapplying your lacquer.
This is not a small job or an easy task to undertake, you will have to plan your job carefully. Here a few things you need to consider:
- Take out all of the furniture in the room, the sanding process will wreck them otherwise. Always lift the furniture as pulling will damage both the floor and your furniture.
- Have a range of sandpaper, from 40 grit up to 120 grit. This will ensure you get a quality, even, smooth lacquer finishes once you are done.
- With all the furniture gone, check the floor for any nails or staples that are standing above the surface. If there any, either remove them or punch them back in.
- Begin to sand using the heaviest sandpaper you have and making your way down to the finest grit.
- Once you are finished vacuum the room, getting as much dust as you can. Be sure to focus on the gaps.
- Take some time. You want to let the airborne dust particles to have settled and have been cleaned away before doing anything again.
- You can now reapply your lacquer. Beginning at the edges, work your way towards the door. You can use a roller for the middle part of the room and a brush for the edges. Always work in sections and follow the grain of the wood.
There you go, your floor is in tip top shape again. If you are unsure of what you are doing, just get in contact with us and we can help advise you as to what will work best for you. See if lacquer is the right choice for you here.
Lacquer FAQ
Do you have any questions about lacquers? Read our list of lacquer of FAQs to answer all of your questions.