

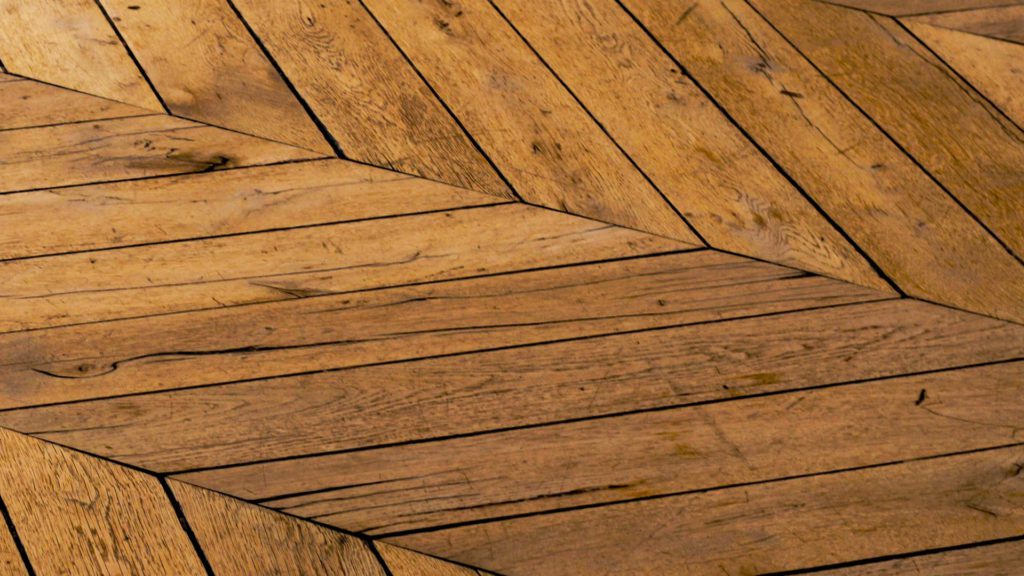
Wood Stain
Our range of wood stains are perfect for your next big job or project that you have in mind. Our wood stain can be shipped all over Ireland and internationally. Enhance the look of your wood and bring out its best qualities with our wood stain.
Wood stain is used to both protect and enhance the look of your wood. The wood stain works by penetrating into the wood, giving it a much more vibrant look and intensity to it’s tone. Wood stains do provide some protection to the wood but are largely used for aesthetic reasons only.
Our wood stains are available in both water and solved based varieties. Our semi-pigmented stains give a multi-coloured look to give life to even the plainest of timbers. We can even colour match our wood stains to your preferred tone.
Solvent Based Stain 1
Natural look stains specially formulated to enhance the colour of timber for interior wood
–
1,3,5 & 20L
–
Product Code: 970444
Solvent Based Stain 2
Natural look stain that is slower drying that 970444 to assist ragging on large areas
–
5 & 20L
–
Product Code: 970448
Wood Stain vs Wood Dye
Providing the wood stain has no additives to it, the difference between the two largely comes down to concentration. Dye is a lot more concentrated than stain meaning that they can be thinned down to the desired colour if needed.
Why Use Solvent Based Stain?
We recommend using solvent based wood stain for multiple reasons. First up is their rapid drying time of only a few minutes letting you do more for less. Secondly, solvent based wood stain allows for a much smoother and even finish giving your timber a much better look and feel. Finally, solvent/oil based wood stains deal much better with humidity and water meaning they are ideal for a kitchen or bathroom environment.
Can I Colour Match Different Timbers?
This can be done but it is not easy, especially if you are looking for an exact match. If you are looking for the timber to all be largely similar looking however this can be achieved. It is vital to understand how the wood stain will interact with the timber and what look this will give. Applying the same stain to various timber types will wield different results for each as the base is different for all of them. What you can do is test a bit of stain on a discrete are of the timber and let it dry so you can see how it will look.
What do I Need to do Before Starting?
When applying stain, we recommend you apply it to new bare wood or timber that has been sanded back. To avoid it soaking into the grand, a sanding sealer would also be a good idea.
What Tools Do I Need?
You will need something to apply the stain with, a brush, roller or a pressurised sprayer will work. We recommend using a sprayer to give the best results and the quickest finish. If the product is applied correctly, it will have an even appearance with no drips, runs or issues.
How do I Prep The Timber Before Staining?
Be sure the timber is clean and free of mould if you plan on interior and exterior use. Do this by inspecting it closely and taking the necessary steps to clean it if there is any build up.
Do I Need To Use Stripper Before Applying?
While you do need to prep your timber correctly, you do not have to use wood stripper before applying wood stain. You will only need to use it if the timber has had a latex product used on it at some stage.
Should I Sand The Timber First?
Sanding can close the pours of the timber, blocking the penetration of the wood stain. If you do have to sand use a low grit sandpaper to best avoid blockages.
Can I Use Filler?
You can use wood filler, but you will need to get a filler that is stainable
How To Stain Wood
Are wondering what is the best way for you to go ahead and stain wood? Coloured wood stains, if used correctly, can improve and elevate the look of your wood and timber. In this guide we are going to tell you how you can get a professional finish, so read on to find out what you need to do for interior wood and exterior use.
Are wondering what is the best way for you to go ahead and stain wood? Coloured wood stains, if used correctly, can improve and elevate the look of your wood and timber. In this guide we are going to tell you how you can get a professional finish, so read on to find out what you need to do for interior wood and exterior use.
Are wondering what is the best way for you to go ahead and stain wood? Coloured wood stains, if used correctly, can improve and elevate the look of your wood and timber. In this guide we are going to tell you how you can get a professional finish, so read on to find out what you need to do for interior wood and exterior use.
The first step you need to do is figure out what kind of timber you are working with. Your timber could be a soft wood like pine, fir, cedar, etc. Maybe it is a hardwood like beech, elm, ash, etc.
There is no easy way to determine what kind of wood you have. If the wood grain is uneven, has lots of knots or has some blotchy patterns it is likely a softwood. This means it will stain unevenly unless you take the proper precautions to apply it correctly. However, some like this uneven finish.
If the wood grain is more even, has no or only a few knots then it is probably a hardwood. You can use your wood stain of choice here as they are much easier to stain than softwood. You may need to use several coats to get the desired look.
Varities
Oil Based Stains: These give long lasting colour by going deep into the woods pores. This brings out the timbers natural beauty
Water Based Stains: Water based stains provide a very even colour, are odour and simple to work with. You can also dilute the colour down to your perfect stain by just adding water.
Solvent Based Stains: Get very good coverage and rapid drying times by using a solvent based stain.
Preparing Timber
- Test out your stain on a piece of wood or on a discrete area to be sure it is the correct colour.
- Wipe the wood down with white spirits to be sure it is clean and free of any dirt.
- Give the wood a sanding. The lower the grit of the sandpaper the rougher the sanding will be, meaning the more wood stain products will be absorbed giving you a darker finish.
- Using a higher grit sandpaper will result in less stain being absorbed and a lighter finish.
- If you are looking to remove any blemishes in the wood, use a low grit sandpaper and then a higher grit to finish off with.
- Once you are finished sanding, wipe the wood down thoroughly to remove any dust and material.
- Apply the stain using your chosen method. Be sure to apply generously in a smooth movement, working in the same direction as the grain and covering evenly.
- If you are unsure of how the stain will permeate into the wood, wipe it on and off with a cloth until you are sure of the behaviour.
- Remember, you can always add but it is very hard to take away.
If you are working with wood filler, try find one that can absorb wood stain. Failing this, you could try some filler gel and adding in some stain to get an approximation of the colour.
How Do I Add Wood Stain Evenly?
Softer woods tend to have issues with staining resulting in blotchy and uneven finishes. Test on a separate piece of wood or a hidden area to see how the stain will take. If it doesn’t give the desired look, rub it with some white spirits to remove any contaminants from the surface and give yourself the best chance of an even finish.
A darker stain will generally give you a more even finish than a lighter one. Their darker pigments giving a more even finish, with more layers giving a darker finish. Before starting, check to be sure your sealer and stain will work together.
If your timber is completely sealed your wood stain is never going to penetrate the timber no matter how much you apply. You might have to dilute the sealer with mineral spirits to give yourself the desired finish. Once again, test it on a spare piece of wood. If you want to stain wood in a really deep colour, a few coats of your stain should be enough.
Once you have the stained the wood add a clear finish. This helps protect the the wood and also gives a glossy finish to make it look even better.
Staining Wood – All You Need To Know
What follows is a step-by-step guide on the best way to stain wood:
– Sand the wood with 180 grit sandpaper
– Get rid of the sawdust with either a cloth or even a vacuum
– Open the wood stain and stir
– Work with a sprayer to use the stain on the wood
– Remove any excess stain by using a dry rag
– Let the stain to dry for one day
– Give a topcoat
There are many nuances to be aware of, as well as some things which you need to know of to ensure your wood staining project is actually a success. Keep reading to learn just how to do it.
How To Pick The Proper Wood Stain
There are various wood stain types available that you must know about prior to deciding to apply a stain to the wooden piece. Some examples are traditional oil-based wood stains, water-based stains, and gel stains. Different stains will have different applications – interior and exterior use is possible for interior wood or exterior wood.
– Traditional Oil-Based Wood Stains
If you have bought a new stain already, it’s likely one of many traditional oil-based stains. In the event the wood stain item is even vaguely titled “wood stain”, then that is precisely what this product is.
Traditional oil-based stains are oil-based liquids that happen to be more toxic than water-based stains. They emit plenty of fumes during the drying and application processes. When working with the product, be sure to apply the stain in a well-ventilated area. Should you not gain access to a place which is well-ventilated, then we suggest opting for one of several water-based stains.
An oil-based stain is used under an oil-based topcoat and can be useful for staining the hardwoods like oak. Because softwoods are noted for unevenly absorbing stains, a normal oil-based stain can easily make a softwood look blotchy (although there are some ways around this).
These are the most inexpensive stains in comparison to the other choices. They may be among the more economical choices, nonetheless they aren’t always a good choice, particularly if are mostly sanding softwoods. They work well for interior or exterior use.
– When Should You Really Work With A Gel Stain
Gel stains work nicely for sanded softwoods like fir, pine, or pretty much any of your inexpensive woods purchased in big box stores. This product is thick which decreases just how much stain the wood absorbs, which leads to a stain appearance that may be more even.
However, the gel stains are much more pricey in comparison to the traditional oil-based wood stain. This product can also is additionally quite difficult to make use of in a few areas like tight corners, meaning it is recommended to apply your stain prior to assembling the piece.
One of several standout attributes of a gel stain is that it will dry on the wood, unlike the conventional oil-based coloured wood stains. This simply means that you can use this system across a previously-finished piece. They work well with interior wood.
Water-based wood stain can be a preferable choice when you have to operate in areas with inadequate ventilation, or when you find yourself using one of several water-based topcoats.
Otherwise, these items are a pricey option without many extra benefits. As well, a water-based stain is not going to penetrate the wood as well as the oil-based stains, which suggests you need to apply more coats as a way to stain your piece effectively.
The Way To Ready Your Wooden Piece For Staining
There are many steps you must follow to ensure that you stain a wooden piece.
– Sand The Wood
The first task involves sanding the piece. The sanding required is dependent upon what sort of wood you will be using. The cheaper lumber like construction lumbar (2 X 4s), common boards, and furring strips, requires a great deal of sanding.
In these instances, we would recommend that you just begin with a 60 or 80 grit sandpaper, slowly working to a 180 grit sandpaper. More pricey wood and boards only need 180 grit sandpaper to seal the pores slightly in the wood as well as remove or minimize manufacturing marks. This will aid the item in staining more evenly.
Never skip the step of sanding, however we usually sand before assembling the piece, as it is quicker to use power sanders in this way (and hand sanding is only a pain). Your wood will never become “un-sanded”, so that you can sand your wood a few days or weeks before you stain.
You could feel inclined to miss this task, but don’t. Sanding creates a significant impact on the final result.
It really is obvious to view that piece which is sanded looks a whole lot nicer. When you have plans to work with wood regularly, choosing a good-quality orbital sander makes sanding processes easier, and is definitely worth the cost.
Sanding, is one step that you need to have performed from the beginning, is additionally one of the better methods to close the pores in wooden pieces. Since the sawdust gets finer, the greater number of it is going to in the pores which helps with controlling stain absorption.
That is why it is advisable to stop sanding whenever you reach a 180 grit. When you keep on sanding above that, the pores may close which will reduce stain absorption.
We have learned that when you sand with 180 grit and after that put it to use using a dry rag (more info on that shortly) normally, this is enough to guarantee a great stain on softwoods, helping to make a wood conditioner an expense which is unnecessary.
As outlined above, we apply my coloured wood stains by using a dry rag. We dip the rag in the stain, combined with blotting it on scrap wood or any other rag. By doing this, my rag will not be saturated with all the stain once we start rubbing it across the wood.
Considering that the rag only contains a tiny bit of the stain, this assists to regulate the amount of the stain absorbed into my wood. As well, while there is only a modest amount of stain, it is easier to evenly apply my stain on the wood.
– Test Sample
Before we start staining any wood project, we first work with a sample from the finishes and stains we want to use.
We do this as a result of many finished disasters, in which the final product failed to look anything near to the things we might have liked. You may make your test samples from your scrap wood which is leftover from your build. This can indicate just how your topcoat and stain will be prior to deciding to apply the items to the final piece.
Test samples are classified as this for a very good reason. I typically test multiple options and stains. For example, we test a rag vs a foam brush, no wood conditioner vs wood conditioner, different stain colours we are just enthusiastic about the assorted topcoats, etc.
By doing this, I have to decide on a finished plan that seems the same as the things we are selecting. If there are actually any drying or adhesion issues, we are going to find out about them well before I use a finish on the project, as an alternative to already messing everything up.
Normally we recommend using test samples for all of the projects which you work with. This method may appear annoying and a total waste of time, nevertheless, you can avoid a tonne of mistakes which could help you save time and effort and headaches in the long run.
Step-By-Step Guide On The Way To Stain Wood
– The First Step: Sand Your Wood
Sand your wood to 180 grit sandpaper. In case the lumber you will be utilizing is actually a solid and good piece, then this is a good and thorough sand, by using a 180 grit sandpaper will probably be enough.
Ensure that you do not skip the end grain or maybe the edges.
If you can, try and sand your piece prior to assembling it. It is then much better to sand considering that the surfaces will be flat.
Step Two: Take Away The Sawdust
Sanding contributes to a great deal of sawdust you need to remove. You may work with a dry microfiber cloth or even your shop-vac to suck the sawdust up.
Step Three: Stir Your Wood Stain
This method is just not that important when working with gel stains, however, when using water-based stains or traditional wood stains, the product has to be stirred thoroughly prior to applying the stain.
The pigments within these goods are heavy, meaning they are going to sink to the bottom within a few hours. That is why it is vital to stir your stain, otherwise, your stain can look diluted through the top, as well as the colour will probably be significantly different after you get to the bottom.It will help to distribute the pigments lying at the bottom. Don’t shake a wood finish container, as this will introduce air bubbles.
Step Four: Rub Or Brush The Stain On The Wood
As we discussed earlier, we like utilizing a rag to make use of the stain. I first blot the rag on something different before rubbing the stain across the wood. Rub the stain from the same direction as the grain. This helps the rub marks to blend seamlessly in the wood grain.
You can even opt for a foam brush. Foam brushes can also be cheap in comparison to normal paint brushes and are generally disposable. An oil-based stain requires considerably more work to clean your brushes (it requires mineral spirits), so throwing the brush away when you are done can lead to a remarkable timesaver.
When you use foam brushes, dip your brush into the wood stain then paint it directly across the wood. The direction that you opt to paint it doesn’t really matter, but how you wipe the wood stain away will matter.
Step Five: Wipe Any Additional Stain Away
When you use a rag, this is an unnecessary step, given that you won’t have excess stains to wipe off.
For those who have used a foam brush, you will see excess wood stain left around the wood. It is very important to wipe any excess product away.
One of the more common wood finishing disasters will occur if you skip this task. Any excess product will not likely dry properly, meaning the wood piece will stay sticky for a while or perhaps even weeks.This is the reason it is essential to} wipe away.
Work with a clean rag to wipe the wood stain away. Be sure to adhere to the same direction as the grain.
When you have removed any excess wood stain, let your rags dry up. Wood stain is actually a combustible product, therefore it is a bad idea to have the wet rags lying in piles, because they could spontaneously combust.
Make certain they are lying flat, and just as soon as they are dry should it be secure to toss the rags away.
Step Six: Allow The Wood Stain Dry
An oil-based wood stain needs to have at the very least 24-hours of drying time prior to applying the topcoat. For any water-based topcoat, it is suggested to hold back no less than 72 hours.
Oil-based and water-based products can encounter an adhesion issue in the event the wood stain is not really fully dry. We usually avoid this problem altogether by matching the finish and wood stain so they can be both water-based or oil-based.
Water-based wood stain products dry much faster, and that means you typically apply your topcoat on the very same day.
If you would like to know the time between recoats (adding several coats of stain), we have learned that using another coat of any}oil-based stain is often unnecessary. It usually doesn’t do much, which could mean you will be squandering your time. Water-based stains and gel stains will often have recoat times of two to four hours. Review the label of your can to be certain.
Should you use a water-based stain, we would recommend sanding after the initial coat to flatten and smooth the wood grain the water raises. It is really not needed to sand when working with multiple coats by having an oil-based stain or gel stain.
Wood That Stains Poorly
Unfortunately, there are many sorts of wood that stain poorly. We have mentioned previously that softwoods can create a blotchy effect. We are going to discuss how you can approach this problem in the following section.
However, there are a number of hardwoods that stain poorly. For instance, maple features a tight grain, meaning the pores of your wood will not absorb stains well. Poplar features a green tint, which generates a strange stain. This is the reason poplar is often regarded as among the “painting” woods.
Certain woods, like teak and rosewood, are really oily, meaning they generally reject a stain altogether. Birch can be hardwood, yet it also stains blotchy the same as the softwoods.
Oak is often the ideal wood for staining, and you will discover it at lots of the home-improvement stores (along with the specialty stores). However, on the whole, hardwoods cost more in comparison to softwoods.
If it is the very first woodworking project you take on, or maybe you have never stained wood before, we would recommend using one of the cheaper softwoods. By doing this, you won’t be ruining a costly board in case you get some things wrong.
There can be a few additional steps involved to guarantee your softwood project ends up well, yet these steps will not be very hard.
Guidelines On How To Stain Softwoods
The ideal strategy to use to minimize blotchiness in softwood is usually to minimize the wood stain distributed around the wood. Here are some of the recommended techniques:
– Sand The Piece Thoroughly
Sand with 180 grit sandpaper to seal the pores from the wood which slows the wood stain absorption. This will likely cause a much less-blotchy appearance.
You might work with a higher grit like 240. If you intend on using this particular sandpaper, work with a test sample first. This can help you to make a decision whether you like you want a 240 or 180 look.
The greater number of the pores closed, a smaller amount of the product will absorb, which could change the stain’s shade.
– Apply The Item Using A Rag
When working with a rag to make use of the wood stain, only a tiny amount of the wood stain may come into contact with your wood. And also this enables you to control how the wood stain is absorbed into the wood. With foam brushes, the wood is going to take on far more wood stain, however, when utilizing a rag, there is a smaller amount of the wood stain to soak up.
– Work With A Wood Conditioner
When you use a wood conditioner in line with the directions, it is going to dilute the wood stain. This will likely restrict the pigments staining the wood which may lead to lighter shades, but it is going to reduce blotchiness.
Unlike sanding and rag methods, wood conditioners are consumable goods, meaning they are going to cost money to get. This is why it is not necessarily our first go-to option.
– Gel Stain
Gel stains use a pudding-like, thick texture, meaning a smaller amount of the wood stain will absorb into the piece. This too aids in controlling wood stain absorption, which reduces blotchiness. This product needs to be applied with rags since foam brushes will waste a great deal of this product. This too helps you to control wood stain absorption.
Gel stains cost a lot more in comparison with traditional wood stains, a rewarding consideration seeing as there are various other options to control absorption.
– Wash Coat
Wood conditioners are a wash coat type, however we chose to first mention other items you could try.
The wash coat is actually a finish within a thin layer that dries on top of your wood prior to applying the wood stain. If you apply your wood stain, the wash coat prevents wood stain absorption.
You may thin down pretty much any finish after which make use of it as a form of wash coat. That said, we actually do not take advantage of this method frequently, especially since you have got to thin this product down, which can take a certain amount of experimentation to ensure that you have it right.
– Staining The End Grain
For those who have never finished wood before, it is essential to understand that without a little bit of additional work, end grains handle stains very differently through the remainder of your own piece.
The final component of wood appears to be considerably more absorbent whenever you use a wood stain. Fortunately, the methods we suggested you employ for softwood can be used as end grain.
We sand the end grain by using a higher grit in comparison to the remainder of your piece. This usually features a 240 grit, while sanding another part by using a 180 grit. In addition, we apply the wood stain by using a rag and take additional care to ensure the rag does not contain an excessive level of wood stain. Yet again, we would recommend practicing these techniques with a test sample prior to giving it a try on the actual piece.